Users and user groups
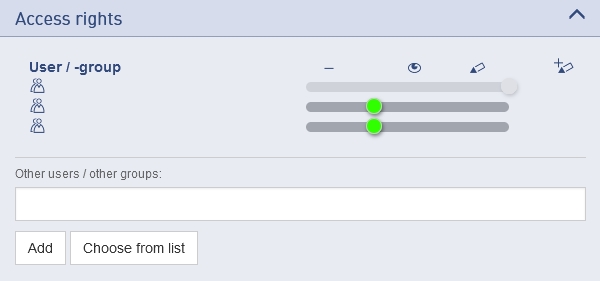
You can define the authorisations of users and user groups for pages and sections.
Use the slider to set whether the user can only view the page, is authorised to edit it or is even responsible for the page.
Please note: only positive authorisation values can be set here. If you want to block pages for individual users (groups), you must define a group that has access and does not contain the blocked user(s).
Add/delete:
If you move the slider to the left to the minus sign, you remove all rights from a user or group. After saving the changes, this user or group will no longer appear in the list of authorisations on this page. You can select additional users in the text field or via the "Select from list" button and then add them.
In "Extras" (menu bar), you can manage users and groups as an administrator or user administrator and, for example, specify which user groups are authorised to use which entry types.

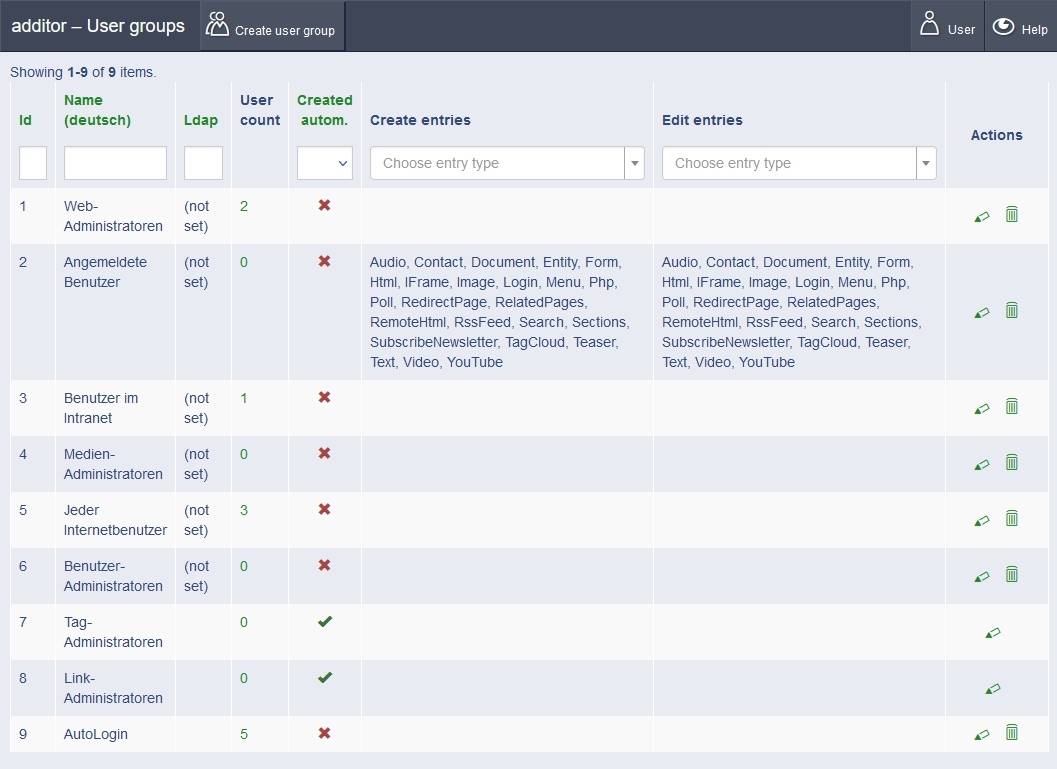
Administration of user groups
Web administrators and personal administrators can create and manage user groups.
The following user groups are already predefined by the programming:
Web administrators:
Web administrators have access to all areas and all content.
Media administrators:
Media administrators manage the media centre. They can make editors' media available to all other editors, edit all media or exchange media centrally.
Person administrators:
Members of this group can create and manage users and user groups and reset passwords. You can specify which user groups are authorised to create and edit which entry types.
Users on the intranet:
additor® recognises whether the IP address of a user's computer is located in a previously configured address range (the intranet). This means that certain website content can only be made accessible to intranet users without them having to log in. However, such pages are not as performant as publicly accessible pages and generate a significantly higher load on the server. This user group should therefore only be used where the page should not be publicly accessible or contains additional information for users on the intranet.
If a public page contains links to pages that are only visible on the intranet, it is necessary to give the "Intranet users" group read authorisation so that a different version of the page is provided for them.
Logged-in users:
As soon as a user logs in, they are automatically assigned to this group.
Every Internet user:
Every visitor to the website is automatically assigned to this group. Pages with read rights for this user group are public and can also be accessed by search engines, for example.

Create a new user group:
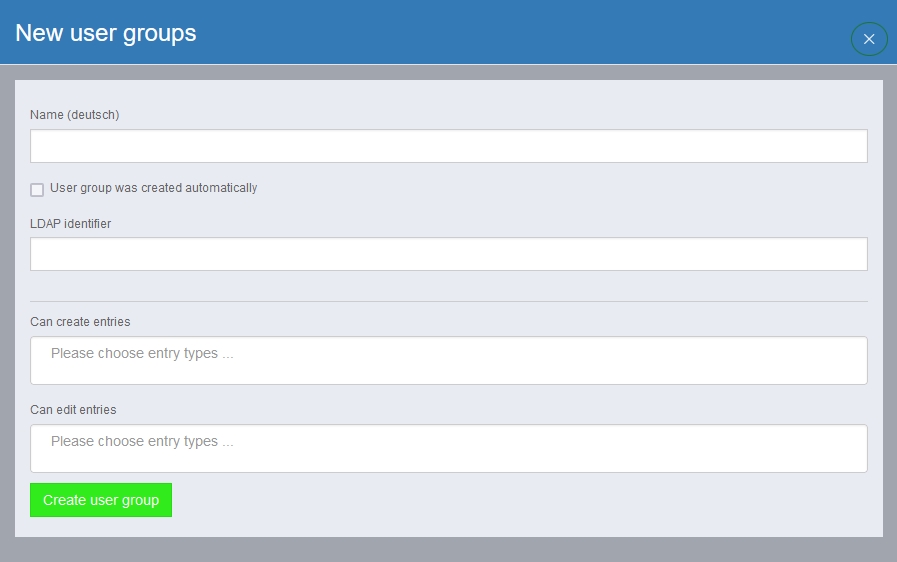
Click on the button at the top left of the bar. A pop-up window opens in which you can enter the name of the new user group and, if required, an LDAP identifier (if an LDAP connection is implemented). The user groups can differ in their access rights to certain entry types.
There are the options "May create entries" and "May edit entries".
There is a button at the top right of the line that can be used to switch between managing user groups and users.

User management
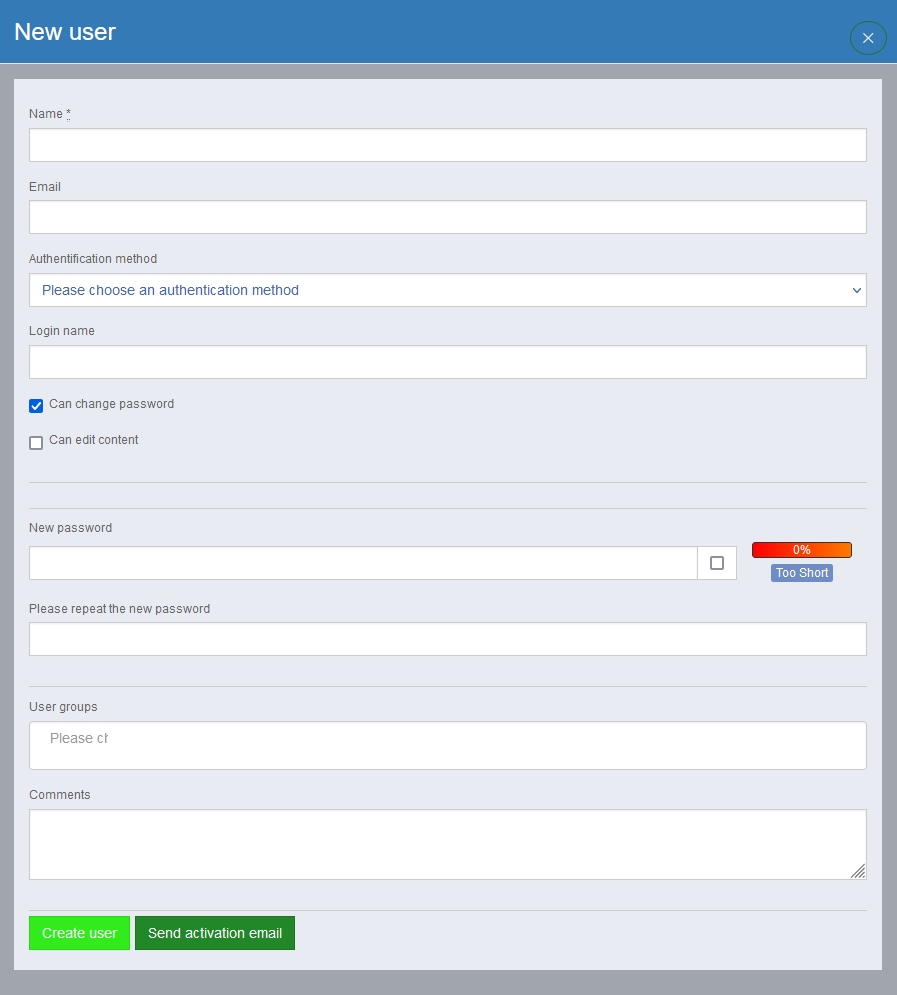
User administration works on a similar principle to that of user groups. In addition to the name and e-mail address (for password changes, publication requests, etc.), the user's authentication method is also specified here. There are two options:
Local: The access data is stored locally on the server. The password can therefore be changed without further ado.
Deny: If a user is to be temporarily denied access, this option is clicked.
You can assign a login name and specify whether the password may be changed and content may be edited.
Users can be assigned to user groups and have corresponding access authorisations.
If desired, comments on the user can be noted here.
You can send an activation e-mail for the account directly from this dialogue window.
Activation e-mail
When you click on "Send activation e-mail", any changes are applied and an e-mail is sent to the user. This contains an activation link that takes you to a page where you can set your own password.
This function is also suitable for giving users the opportunity to reset their password, e.g. if they have forgotten it.
